

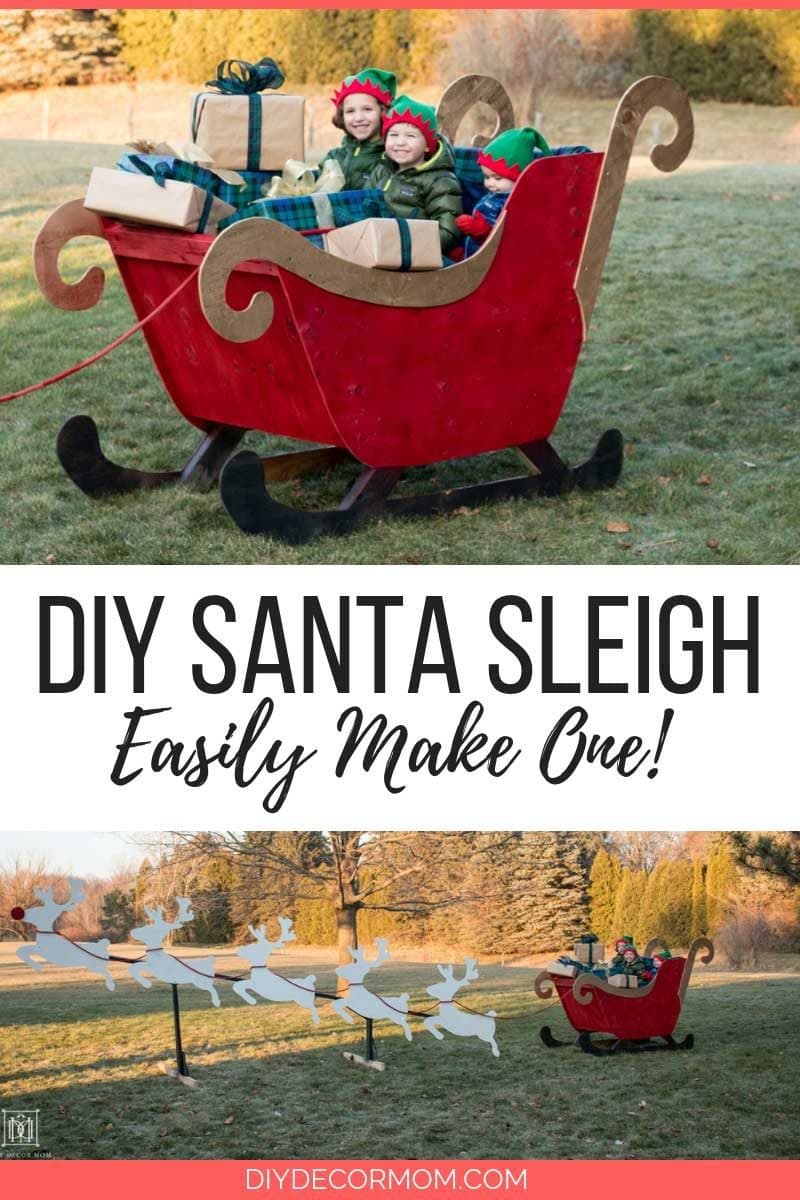
How To Build A Life Size Santa Sleigh
DIY Santa Sleigh: Looking to build your ain Santa Sleigh? Here'south everything you need to know to build your own DIY Santa'due south Sleigh for your kids this year! Our kids admittedly love this DIY wooden sleigh and have had a nail pretending to be elves! See all the materials and directions below to make your own!
DIY SANTA SLEIGH
*This post has been sponsored by Krylon ® Make. All thoughts and opinions are mine alone.
MATERIALS:
- (3) spray paint colors:
- (1 can) Krylon® ColorMaster™ Paint + Primer – 25% More than Satin Blackness
- (2 cans) Krylon® ColorMaster™ Paint + Primer – 25% More Gloss Cherry Ruddy
- (1 can) Krylon® ColorMaster™ Pigment + Primer – 25% More than Metallic Gold
- (4) sheets of plywood- we used 11/32″ thickness
- (v-half-dozen) 2x4s
- 1-¼" drywall screws.
- box cutter
- chalk
- cardboard or rosin paper (see beneath under templates)
- jigsaw
- permanent marker
- 80 dust sandpaper
- circular saw
DIRECTIONS:
Ok, this was a really fun build! It was unlike from nearly of our projects in that it was meant to be a "quick and dirty build." This is a fun Christmas ornament–non a piece of fine piece of furniture! Then information technology was really fun to go into this project without a fully detailed plan and not knowing exactly how it was going to plow out. We couldn't exist happier with the results and nosotros're already getting compliments from the neighbors! Beneath nosotros've broken downward the process into 5 sections, so y'all can easily build your ain!
Making the Templates for Santa's Sleigh:
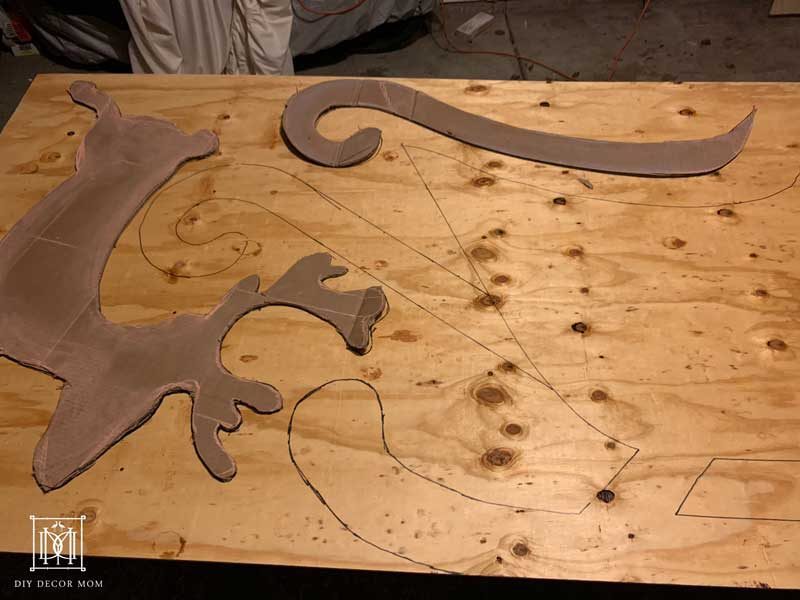
I of the trickiest parts of this build was drawing the total-calibration shapes of the reindeer and sleigh. We concluded up using chalk to free-hand sketch the outlines onto large sheets of paper-thin. The chalk worked really well considering if we didn't similar the style one part looked information technology was like shooting fish in a barrel to erase it and draw it again.
Once nosotros were happy with the shapes we cut out the outlines with a box cutter. Honestly, if I could do it over, I would effort to observe some kind of cardboard or heavy paper (like rosin paper) that I could cut with scissors. The cardboard we used was corrugated and super thick and it was kind of difficult to cut and the edges were pretty ragged. Nevertheless, it all turned out fine in the end. We made one template each for the sleigh, the reindeer, and the two decorative aureate scrolls that adhere to the sleigh sides.
TIP: To scale-up the reindeer nosotros used the "grid method" where you draw a grid over the epitome you want to scale-up, then draw a big filigree on the cardboard and then copy each square from the small grid to the big grid. It's the easiest method to brand an image larger if you don't have use of a projector!
In one case we had the templates cut out, we laid them (the 5 reindeer, the sides of the sleigh, and the decorative scrolls) on top of the first sheet of plywood and tried to nest them together fitting as many figures on ane sheet of plywood as possible. We used a permanent marker to trace the templates onto the plywood which left a prissy nighttime mark that was piece of cake to see when cutting the pieces out. Nosotros ended upward being able to fit ane sleigh side, i reindeer, and two curl pieces on one iv×8 sheet of plywood. We marked and cut ii sheets of plywood like this since nosotros wanted our sleigh to have 2 sides. The third piece of plywood could only fit iii more reindeer – so that's how nosotros concluded up with 5 reindeer!
Cutting the templates out:
Nosotros used a jigsaw to cut all the pieces out which was like shooting fish in a barrel, information technology simply took some time.
TIP: Don't be afraid to replace the bract if it feels similar it's getting tedious part way through cut out the pieces. A new bract can make all the difference!
Afterwards cutting out the pieces with the jigsaw, we very apace sanded any rough edges with 80 grit paper but to have down whatsoever splintering or jagged edges.
Finally, we cut out 1 circle about 4" diameter to pigment bright red for Rudolph'due south nose–using a yogurt container top out of the recycling bin correct there in the garage. Feel free to use whatever circular template you want for the desired diameter circumvolve for Rudolph's nose!
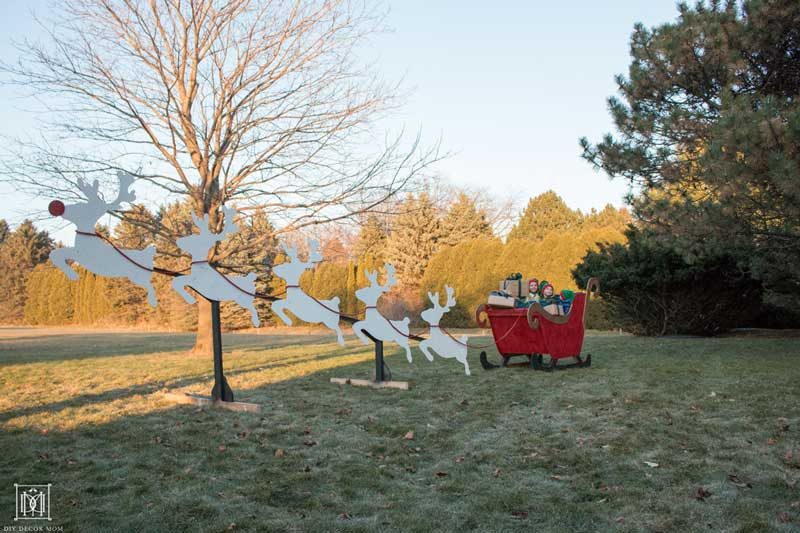
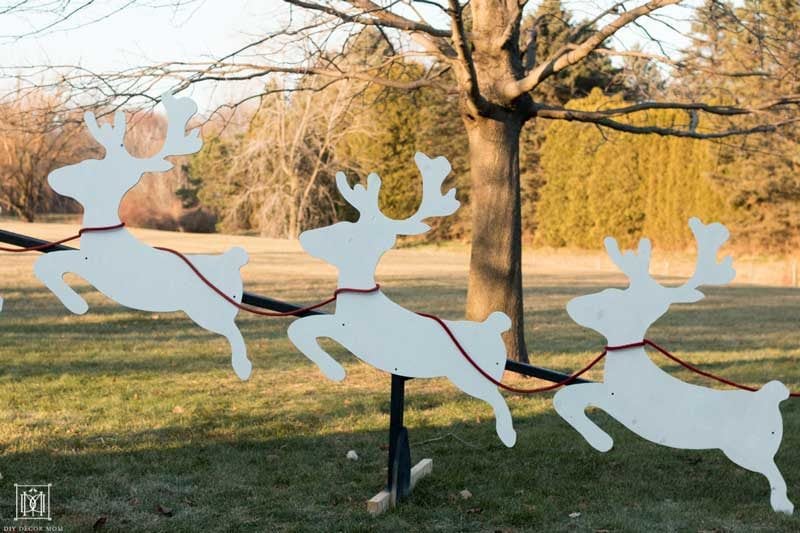
Making the reindeer fly:
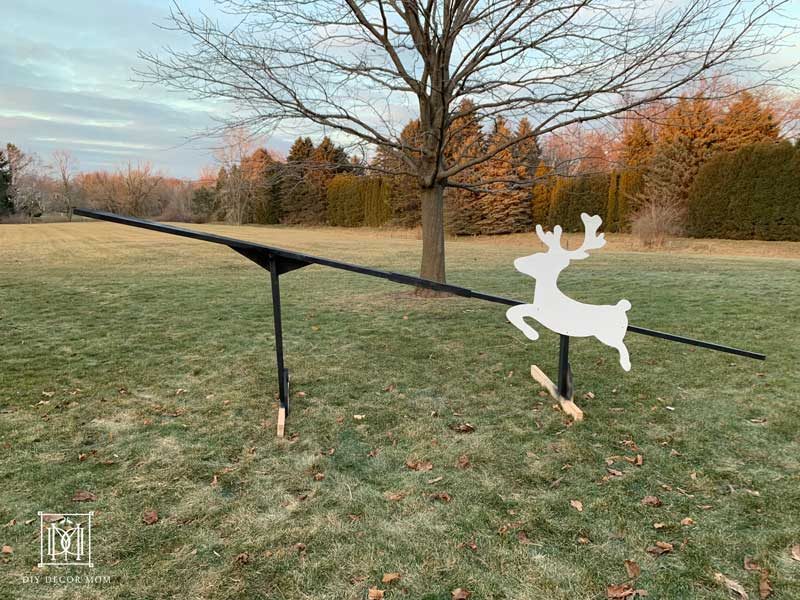
We really wanted to make the reindeer await similar they were taking off into the night heaven. To do this we came upwards with the idea to attach them to one long sixteen foot piece of 2×4 (you can commonly find a 16' long two×4 at the dwelling house middle;) merely, if y'all can't (or you don't want to drive home with a ii×4 as long as your automobile) you tin also merely splice (2) 8-ft. long 2x4s together with a couple scraps of plywood like we did.
To make up one's mind the height and angle I laid the long support on the floor of the garage and bundled the reindeer on acme of it to see how they should exist spaced out and what angle looked best. I settled on a 10-degree slope for the reindeer support. To hold the back up at this angle I cut-out a 42″ and an 18″ vertical supports. Those are then screwed to a 4' long 2×4 using some fleck plywood to brace the corners. All the scrap plywood was only cutting from the pieces leftover from between the reindeer and sleigh cutouts.
Making Santa'southward Sleigh:
We didn't really have a plan for how to put the sleigh together when we started but information technology even so turned out great. Depending on the sleigh shape you chose, you might need to assemble the sleigh a scrap differently; merely, the aforementioned principles utilise. First, we knew we wanted a floor, so we put 1 of the sleigh sides up on the sawhorses, and cutting a 2×4 to support the floor forth the bottom edge of the sleigh above the runner.
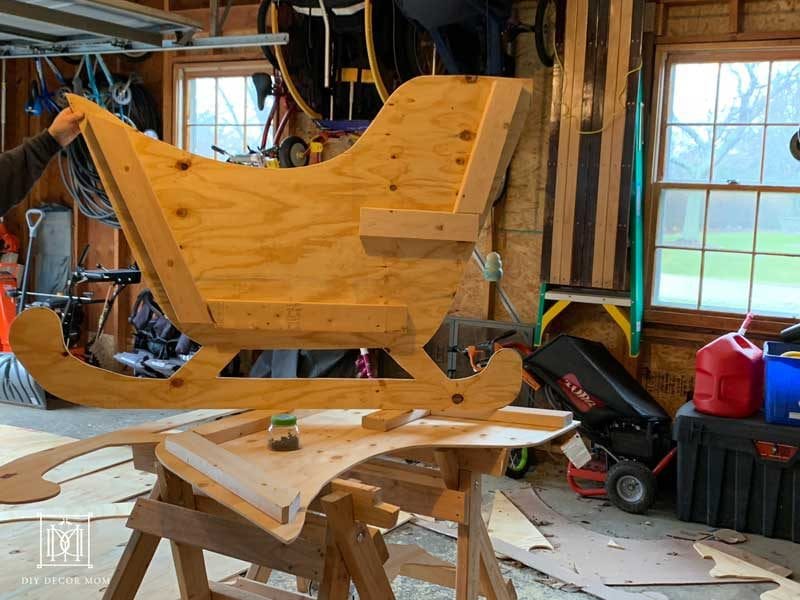
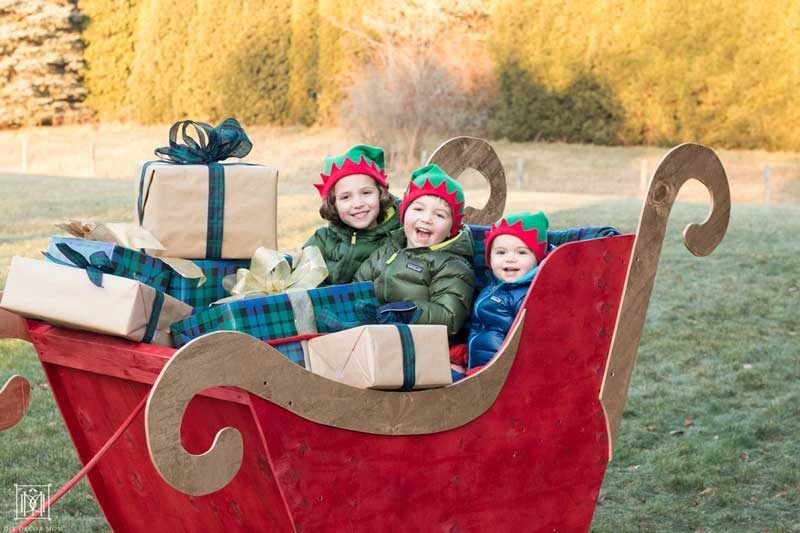
Adjacent, nosotros knew nosotros wanted a seat; but, we didn't know how high to make information technology. So nosotros ended up measuring a couple of small-scale chairs the kids have in their playroom to decide the optimal dimensions. These were 11 inches off the floor and 10 inches deep – so I added more 2×iv braces to support the seat and seatback.
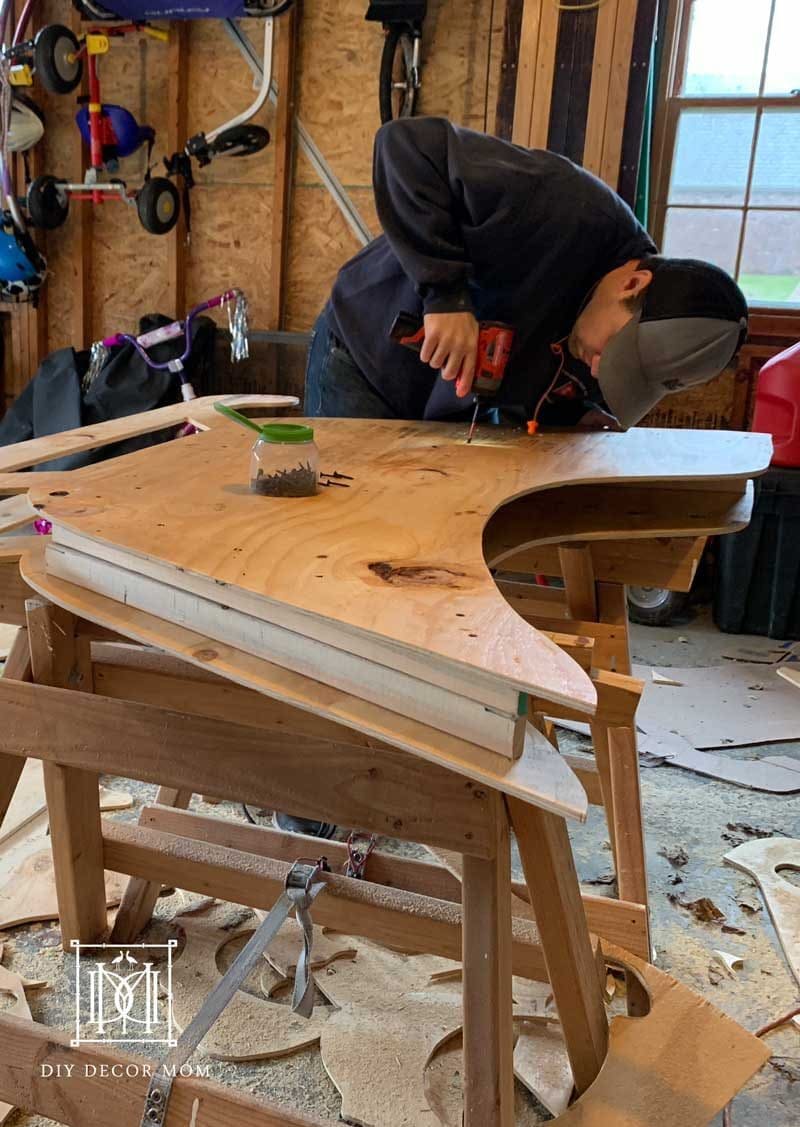
We also wanted to add a front to the sleigh, then nosotros cut a ii×4 to back up the front. All these cuts were done by hand with a circular saw–again, quick and dirty.
To exercise the 2d side to the sleigh, we cut the 2d gear up of two×4 braces the aforementioned sizes equally the first. Nosotros laid them right on height of the beginning pieces and and then placed the 2nd side on superlative of that making certain to line up the sleigh sides and support pieces. Then we could just screw correct into the second ready of supports from the top – and voila – 2 mirror-paradigm sleigh sides!
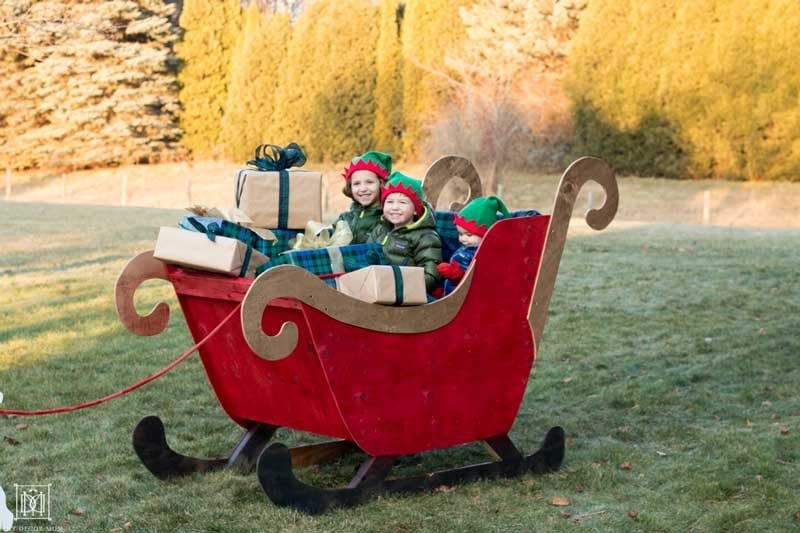
The two sleigh sides are connected with plywood screwed into the 2×4 supports. We picked 32 inches for the width by eye as it seemed like the right proportion. I used the circular saw to rip the quaternary piece of plywood to 32 inches and and so cantankerous-cut the floor (22"x32"), seat (x"x32"), seatback (14"x32"), and front (24"x32") to length and screwed them into place.
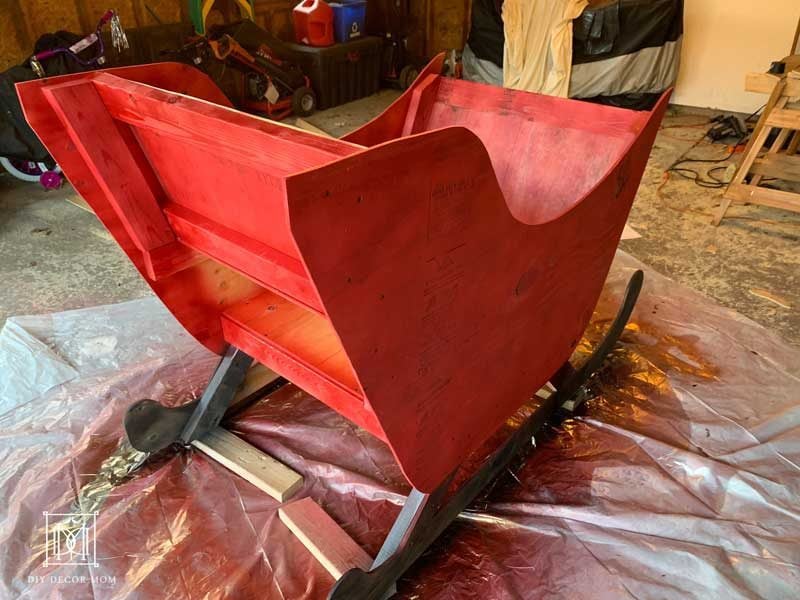
Spray painting everything:
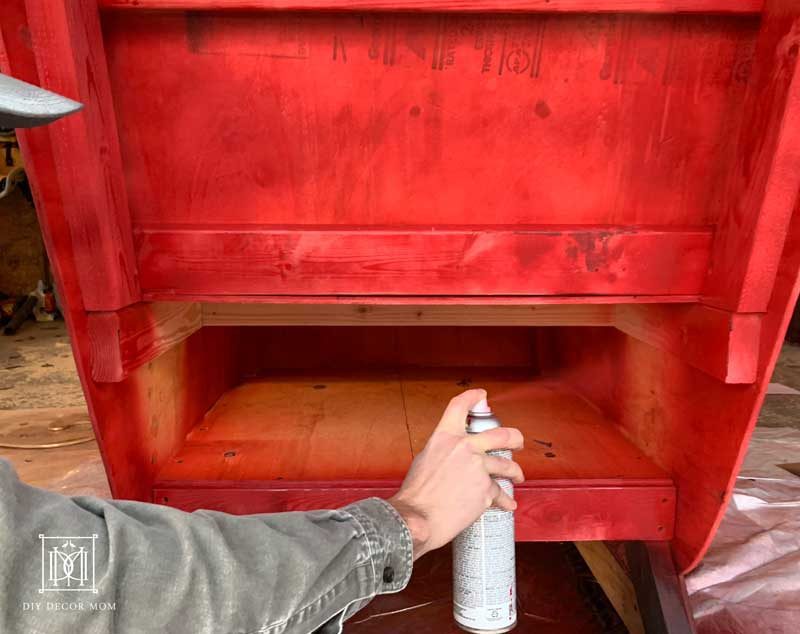
Nosotros started past painting the sleigh red equally it was the largest surface area. Every bit ever, remember to read the spray pigment label for prophylactic and application instructions before commencement to spray paint. And of course, always spray pigment in a well-ventilated area.
We used Krylon ® ColorMaster™ Pigment + Primer – 25% More Gloss Cherry Red for the sleigh, so we were able to skip priming the plywood, which saved a lot of time. While we idea it would take 5 or more than cans to comprehend the sleigh red, we were blown away past the fact that nosotros only used two cans! Krylon spray paint really covers well!
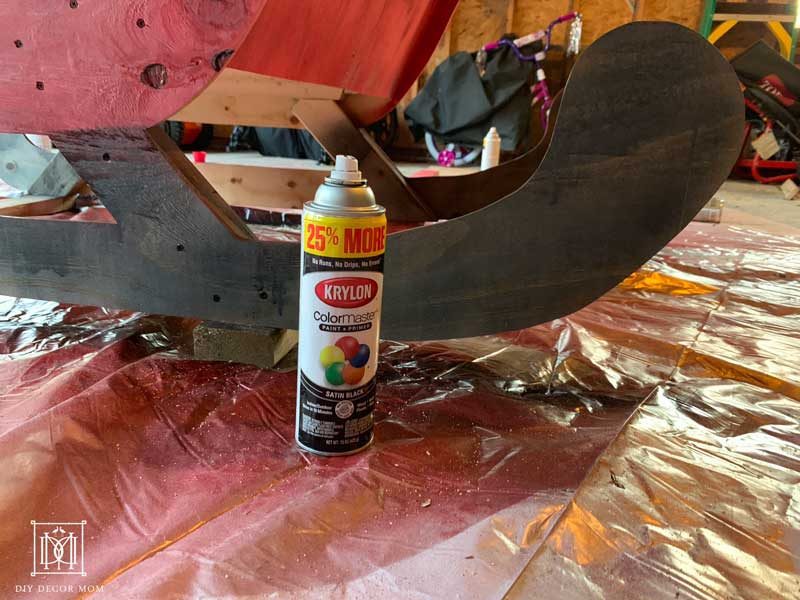
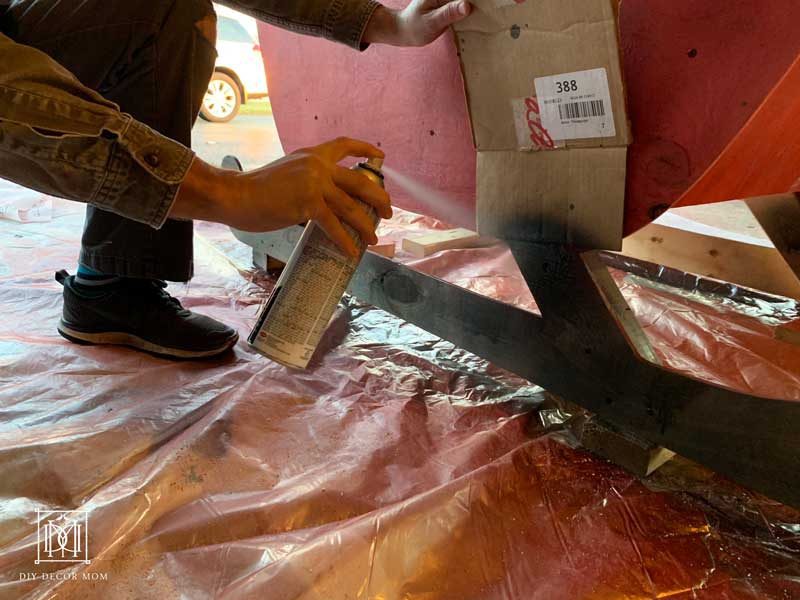
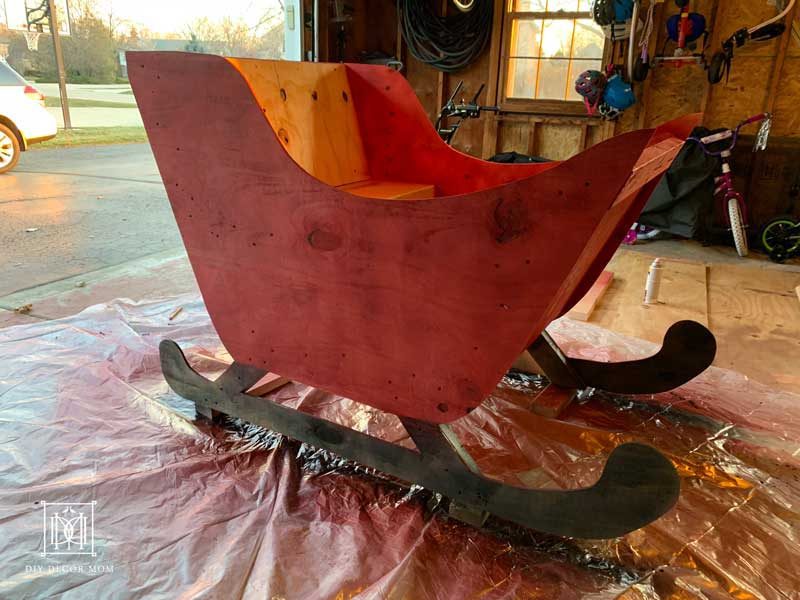
Nosotros then painted the runners black using Krylon® ColorMaster™ Paint + Primer – 25% More Satin Black. To produce a straight line, nosotros used a piece of cardboard as a hand-held shield to keep spray paint off of areas we wanted black. It produced a nice sharp line and was manner quicker than using painter's record! Merely make certain to comprehend all the red areas of the sleigh with the cardboard, so there is no overspray.
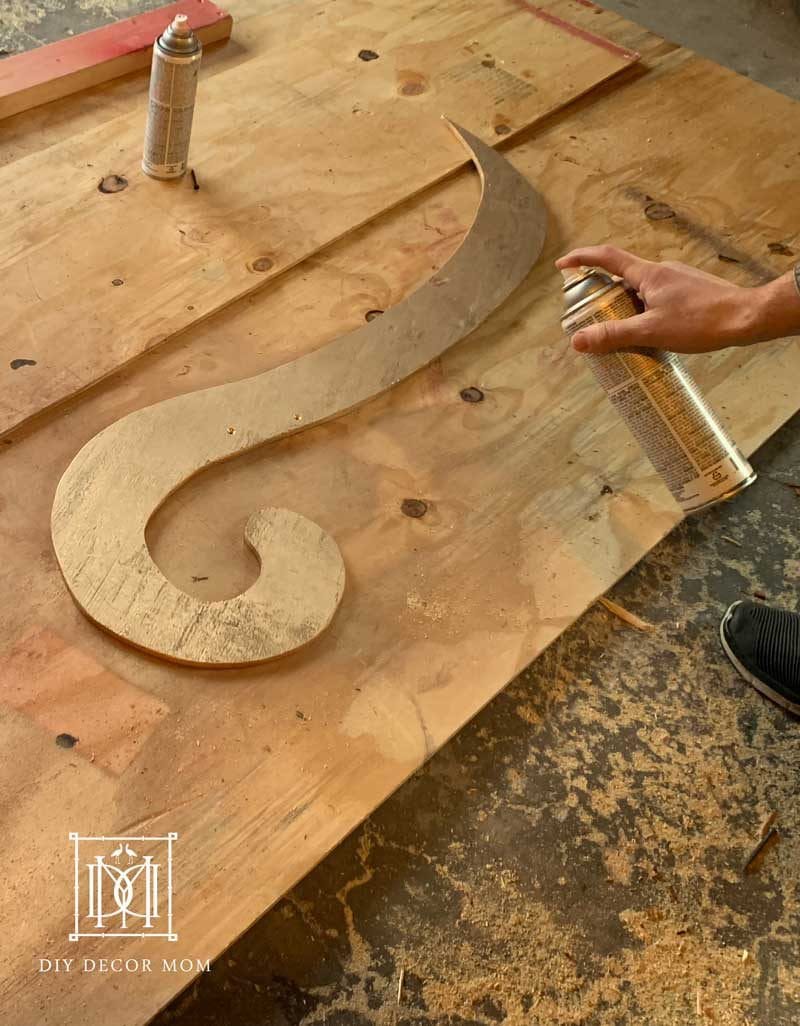
Next, we spray painted the gold decorative scrolls using Krylon ® ColorMaster™ Paint + Primer – 25% More Metallic Gold, which produced amazing results. The gold really pops against the bright reddish sleigh.
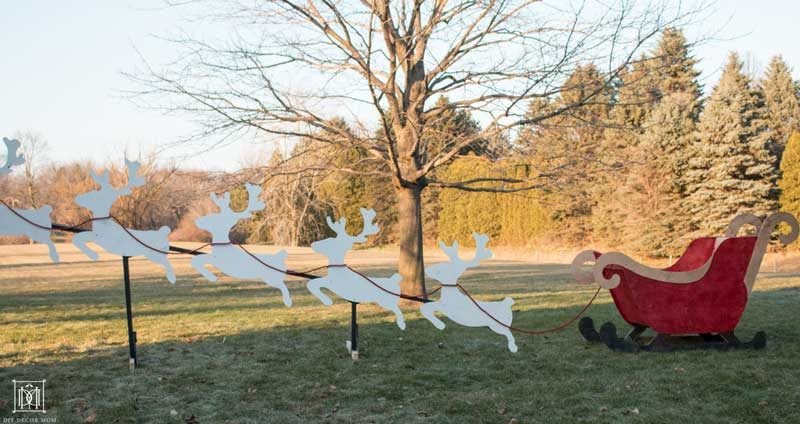
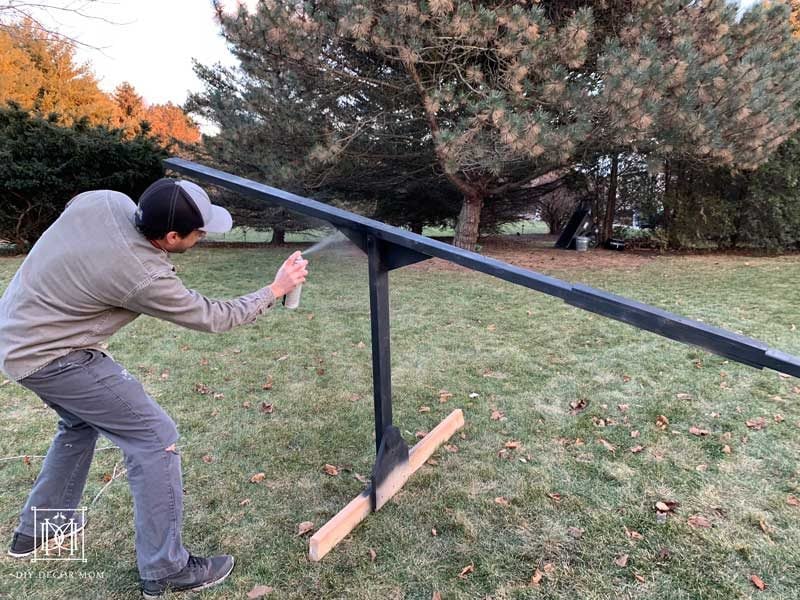
The reindeer support was painted black using Krylon ® ColorMaster™ Paint + Primer – 25% More Satin Black so information technology would fade into the groundwork. It only took two light coats for the support to be fully covered!
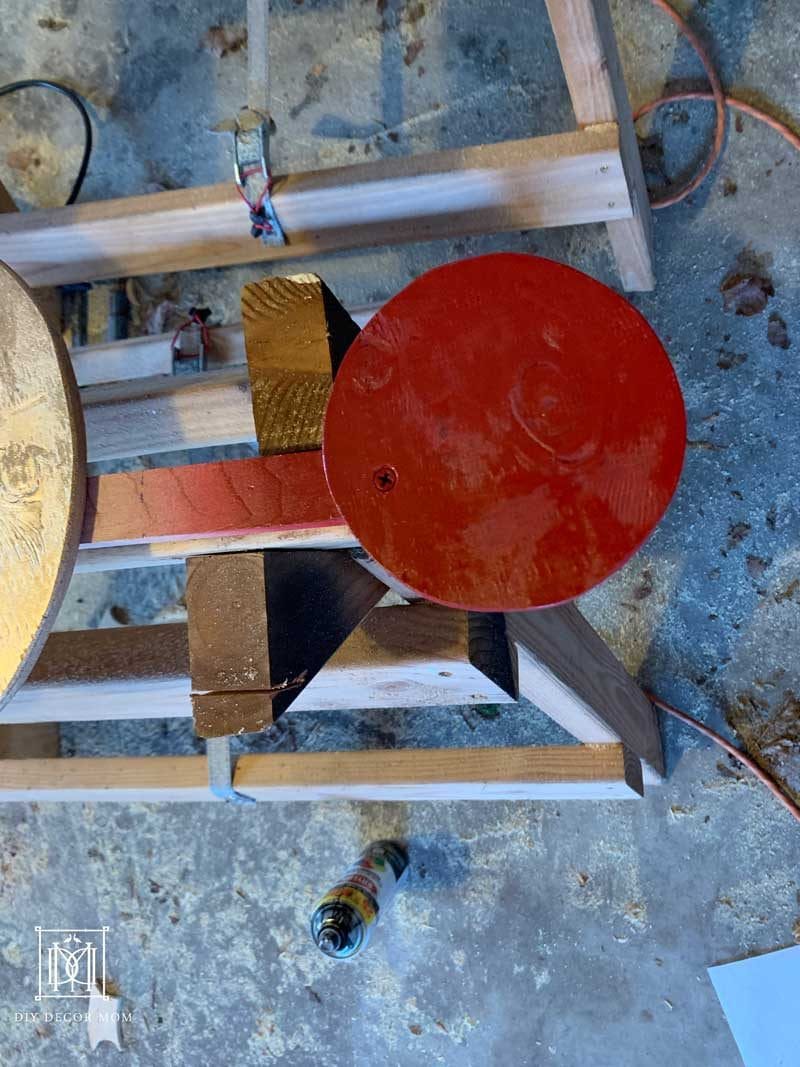
Finally, we painted Rudolph'due south nose reddish and screwed it in identify once information technology stale. Information technology was a fun playful touch to the DIY sleigh and is one of our favorite parts of the unabridged build!
Past using ii light coats on everything, we were able to spray paint the unabridged sleigh and all the components in less than 20 minutes. Spray pigment really is the fastest way to get the colour that y'all want–information technology's why we love it! All the sleigh components were dry out to the touch inside 10 minutes and difficult enough to handle in one hour.
Finishing Touches on Santa's Sleigh:
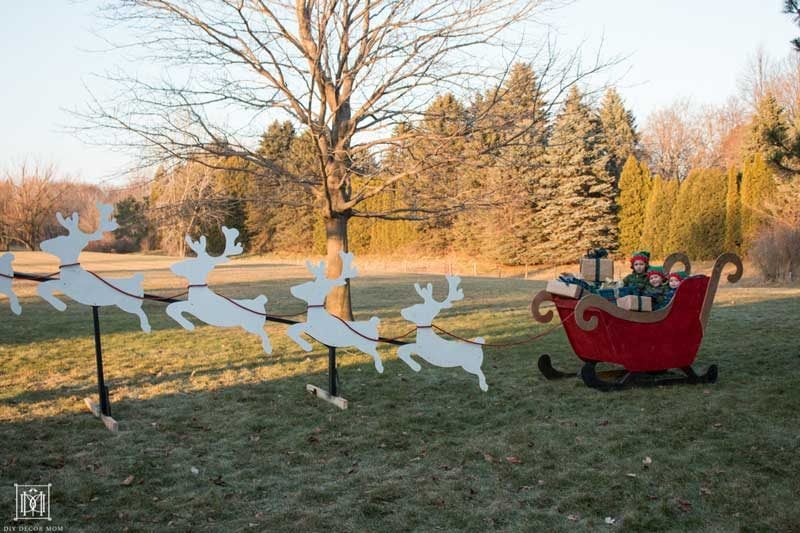
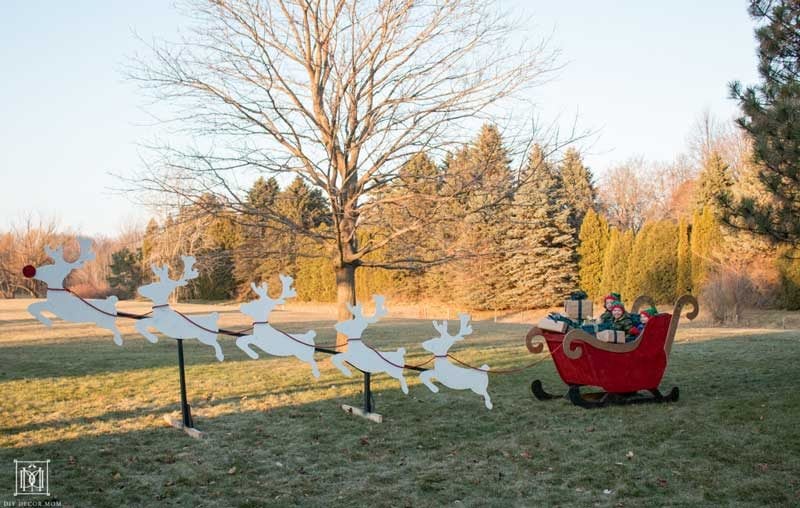
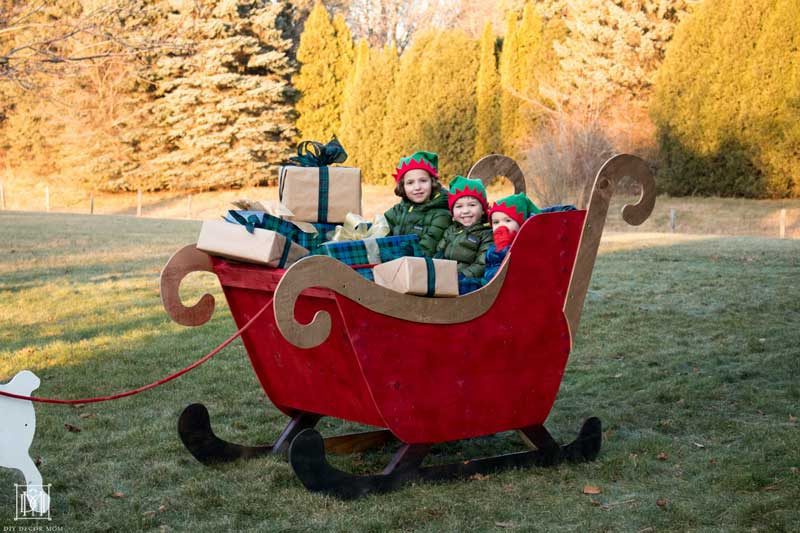
We added a plaid coating to the seat and tied a red rope to each reindeer to make a reign. Then nosotros let the kids come up out! They were over the moon! Similar we said above, the best part of this project is that it is meant to exist fun! Seeing the joy on the kids' faces as they pretended to pack the sleigh with the presents and order the reindeer near made it all worth it! All the neighbor kids have come over to play in it too, which has been a great lark from the cold weather this time of year!

How To Build A Life Size Santa Sleigh,
Source: https://www.diydecormom.com/diy-santa-sleigh/
Posted by: johnsonthearle.blogspot.com
0 Response to "How To Build A Life Size Santa Sleigh"
Post a Comment